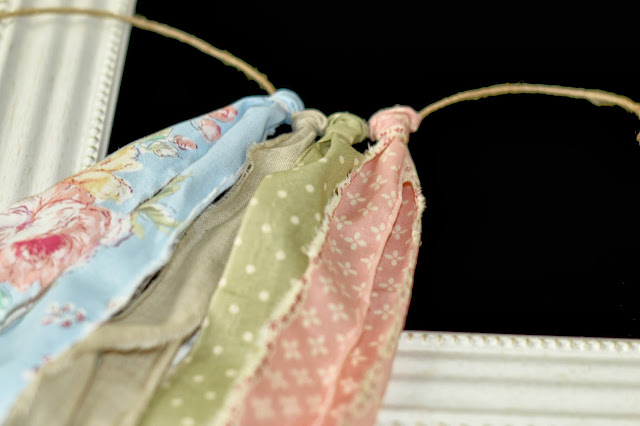
Now that I have gotten into photography I am ALWAYS looking for simple (cheap) props that add some texture and definition to the background of pictures. I have seen many variations of fabric banners (or any banners for that matter) used in pictures, so I decided to try my hand at making my own.
Things you'll need:
1 yard of at least 4 coordinating fabrics...but try not to go all "matchy matchy" or it takes some of the character away from the banner.
3 yards of twine (at least, I cut mine way longer because I didn't want it to be too short)
Scissors
Optional:
lace ribbon or other type of ribbon (I used a lace because I was going for a more vintage feel with my banner).
The next thing you'll need to do is decide from which side you are going to start cutting (this is a step that was not in any of the tutorials I found) if you unfold your material you will notice that you have the dimensions of a rectangle, with the longer sides being your yard. If you decided to cut along the shorter side you will end up with longer pieces of fabric, therefore ending with a banner that is longer in lenth, but shorter in width. If you decide to make your cuts along the long side (yard long) you will end up with a shorter length, but longer width. I cut along the longer side.
You will need to make 1-2 inch slits all along the fabric. DO NOT try to measure or be perfect here...it doesn't matter...I promise!
Then, simply begin to rip the fabric along the cuts you made (this would be a great way to get kids involved).
You will end up with however many piles of fabric that you chose to use.
Then, you will fold the strip of fabric in half (again, perfection is not the goal). You will then place the halfed part under your twine and then bring the two ends up over the twine and put them through the top piece of fabric. Then pull until tight on the twine.
Make a pattern of your choice with your fabric. Repeat the process until you are done.
Note: I put the lace ribbon about every 3 sets (or every 16 pieces of fabric), as the ribbon was pretty expensive (even 50% off) and I didn't have enough to include it with every set of 4 fabric pieces.
Now, you have a fabric banner that would be cute for so many things.
Ideas for use:
photography prop
above a bed
across a mirror
the skirt on a crib
and many more
Here is one way I used it in pictures....


This banner is so very cute! I really want to make one of these!
ReplyDeleteThat banner is so pretty! That is the same technique I used for a tulle skirt!
ReplyDeleteSo cute!
ReplyDeleteGorgeous! I love it! I want to make one now for a photo shoot! ha ha
ReplyDeleteOMG soooo dang cute!!!
ReplyDeleteThanks for the tutorial! I might have to try my hand at one of these...have a great weekend!
ReplyDeleteSuch a good post! So glad I found your blog, it's adorable!
ReplyDeletecantbuymelovvve.blogspot.com
love this banner! so cute and stinkin' easy! Sounds like somethin' even I might manage to pull off ;)
ReplyDeleteAdorable banner!!!!! I love that idea. I have little girl so I can see that happening soon haha. I'm your newest follower so I thought I'd introduce myself. Hope you'll stop by my blog and follow along as well!
ReplyDelete-Christina
The McGuire Family
MarkChristinaMcGuire.blogspot.com
this looks amazing! wish we had the patience to make one
ReplyDeletewww.mkstyleramblings.blogspot.com.au